By: Mark Heaps on Sep 28th 2012
Source: psd.tutsplus.com
Have you ever poured orange juice on your cereal? It sucks! Wouldn’t it be great if right after that happens you could easily alter that orange juice and just make it milk? Unfortunately, no one has invented a Find and Replace button for real life and there is no way to automatically replace the orange juice in your cereal for the milk in the carton. Fortunately, for designers, that’s not the case. In Photoshop, it is quite easy to make quick edits to your files if you know what you’re doing. In this article, we will explain everything you need to know about non-destructive editing techniques in Photoshop. So the next time you pour orange juice into your cereal, so to speak, you will know exactly how to salvage your breakfast.What do non-destructive editing (NDE) practices mean? Well basically, NDE means working in a way that doesn’t alter any of the original pixel data. When working with your Photoshop files. Try asking yourself two important questions.
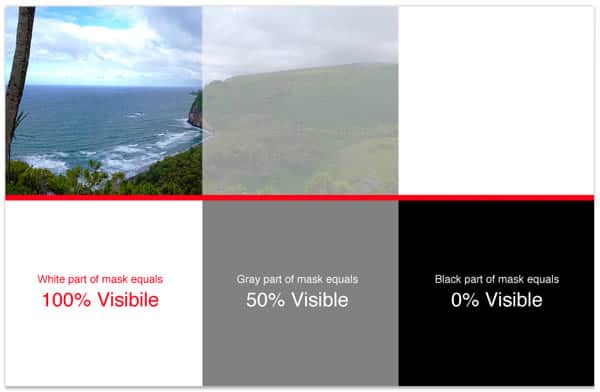
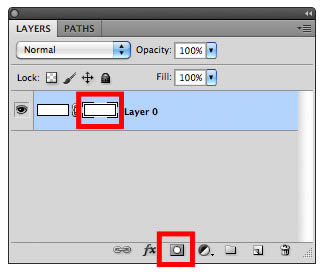 This is the first step in your efforts for working non-destructively. At one point in time people were actually using eraser tools and permanently removing pixels from a photograph. This wasn’t really a good way to work. The mask feature is a much better option.First thing to remember relating to masks in RGB mode: White = Visible / Black = Not Visible. Any shade of Gray is a form of partial visibility (Transparency) and it relates to the spectrum range. For example, the closer the shade of gray is to white the more visible it will be from the mask. Dark gray will be less visible because it’s closer to black.
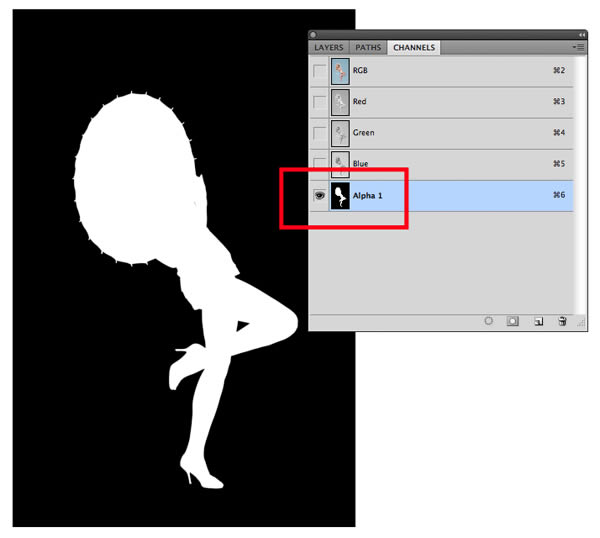
 This all relates to a basic understanding of channels, which we won’t dive into here, but Alpha Channels are a great way to depict this. Because it equally follows the same formula except it is related to selections versus visibility. The technology and technique are the same when representing what will be selected, not selected, or partially selected.
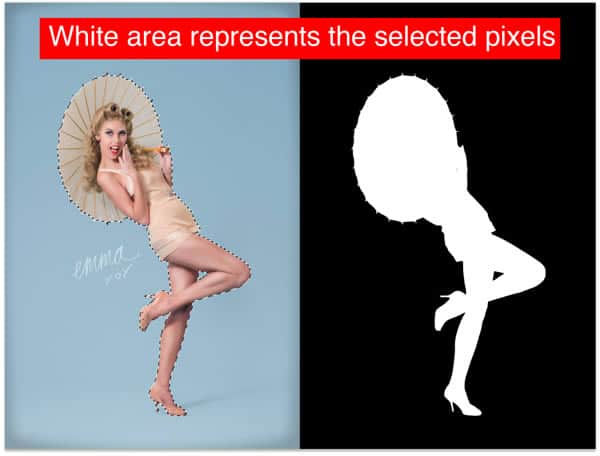 So now you understand the concept of a mask and how it works. You will learn there are layer masks, layer groups with masks, quick masks, etc.One useful tip you can try, is to add a layer mask when removing a background, now put that layer in a set and add a mask to the set. This way you can keep editing, while having an interim point on your layer mask.
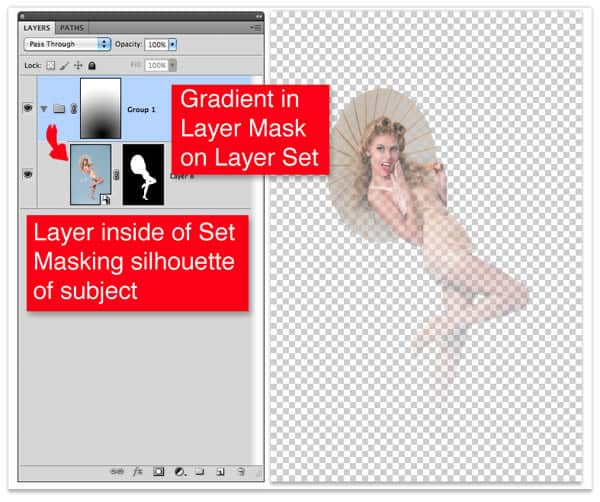 Another type of mask is a Vector Mask. These are a great addition to Photoshop especially for non-destructive editing techniques. The vectors are highly editable after you make one and they are completely scalable which negates some of the challenges of rasterization.
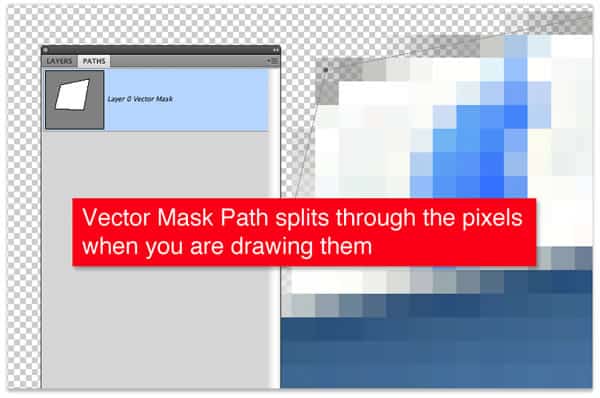
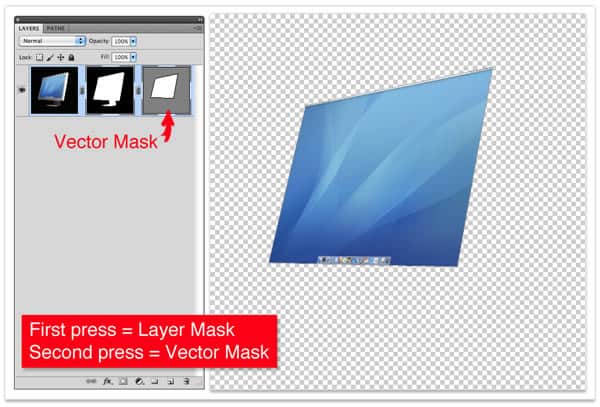 I find myself using more and more Vector Masks over time. What’s really neat about Vector Masks is that it’s basically an old-school Clipping Path set on a layer within a PSD document. So if you have ever done that with InDesign or Illustrator the technique is similar. Not only is this NDE, but you can also cut a path right through a pixel, which isn’t something you can do with a traditional layer mask. Photoshop will then automatically figure out which pixel coordinate is nearest to the path and apply the mask therein.
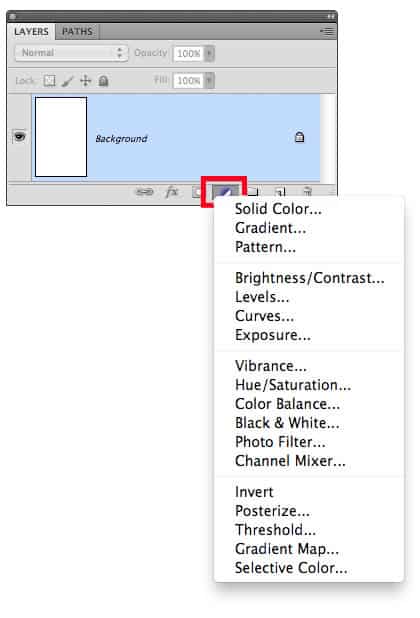 Traditionally when designers needed to adjust things like Brightness and Contrast (which I never use), Levels, Curves, Hue and Saturation, etc., they would do that through the menu bar and apply those changes permanently to the image or layer.
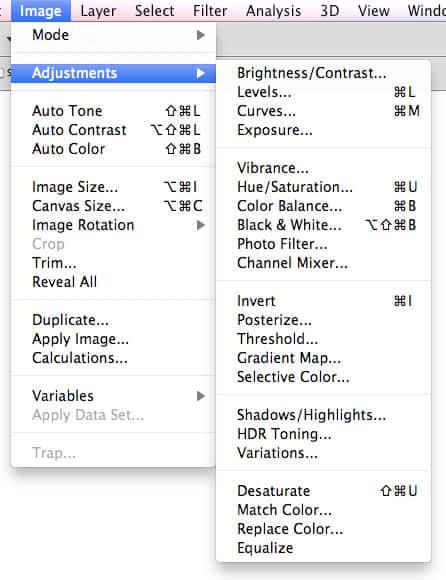 This is destructive in the way that it alters the original data source. But thanks to Adjustment Layers, you can now assign those edits to the whole file or a specific layer using a clipping group. To make things even more finite and granular, the Adjustment Layer has a mask of it’s own, which means you can designate areas that should be affected.
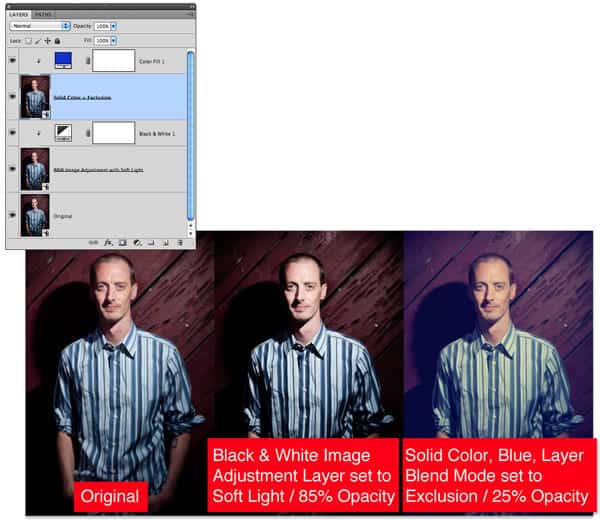
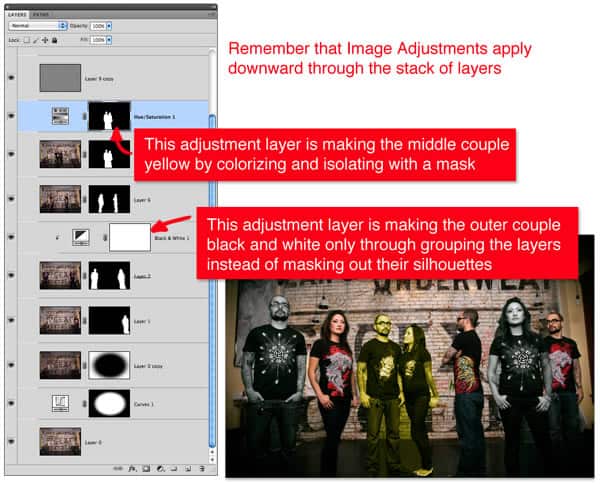 The best thing about this, when working on a design team, is the ability to go back and adjust these values at any point after the file has been approved. Where I work, most of our graphics are shown on projection systems for presentations, so if a graphic looks “too punchy” in a projection test. I can go back to the source Photoshop file, adjust the Image Adjustment values, something like Curves, save out my new asset and go test again.The other added advantage of using Adjustment Layers is the value of it having Layer Options. So instead of dialing back the interior settings of the Image Adjustment, we can also reduce the opacity of the layer or for a dramatic effect we can change the blend mode of the Adjustment Layer.As seen here, if I just make a black and white Image Adjustment Layer and then change the blend mode to Soft Light I get a greatly more dramatic image. Or try using a blue solid color layer and an Exclusion blend mode, that starts looking “vintage”.
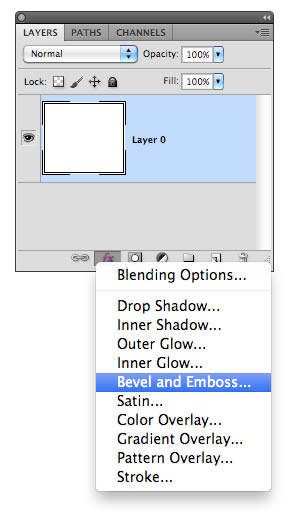 These were the interim step in more NDE practices for Photoshop. For many of you, if I said “Add a Bevel and Emboss to a button” you wouldn’t think twice about it. You’d have your shape layer, editable vector of course, and you’d apply the Layer Style. But in the old days we had to mix and match filters that were permanently applied to a layer’s pixels. This was horrible! Because filters were such a specific look that if a client didn’t like it, you started from scratch, again.In the goal of NDE, these values are now attached to a layer, which means after you do a print test, web test, or projection test, you can easily alter the values by double clicking on the layer style and bringing up the options of that style.
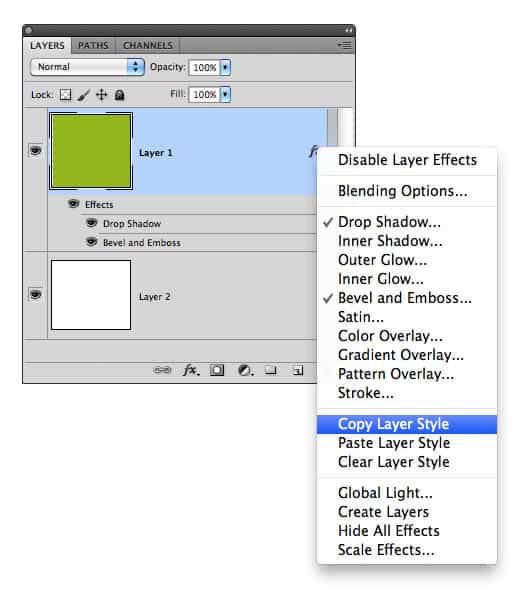
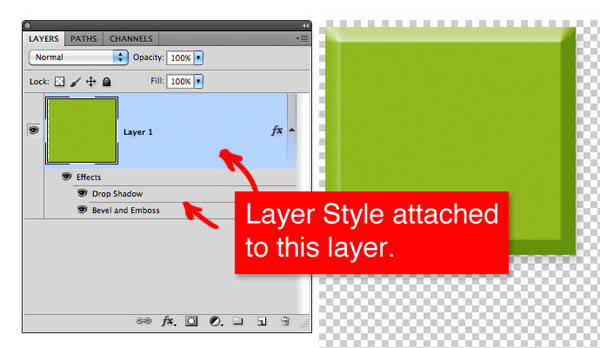 Even better, you can copy and paste those styles to other layers to more quickly duplicate a visual treatment. Just right click on the layer with the style applied to it.This saves a lot on your computer not having to process the permanent change to the pixel data and instead just render an appearance until you save a version in the file format you need.Tip: Another good trick, shift click on multiple layers and you can paste the style to many layers at once.
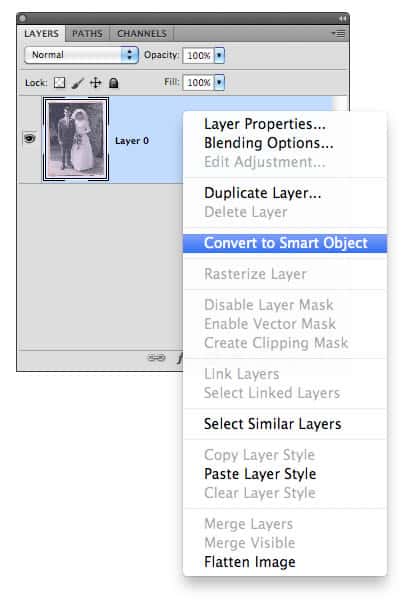 It takes that source pixel data, and makes a link to itself as a self contained file source.
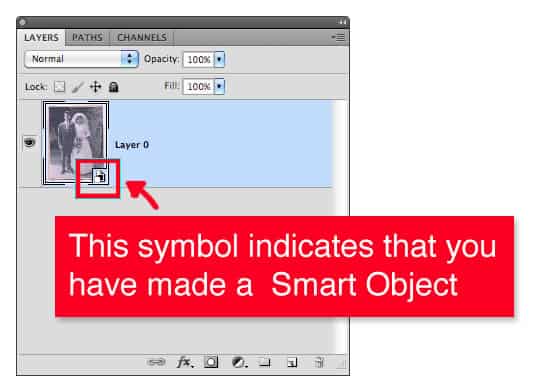 The first advantageous area I discovered use for this, was creating layouts. If you regularly scale and resize design elements this causes them to slowly degrade with each change. In essence, interpolating/resampling pixels on a layer each time you resize it. But, with smart objects, those transformations are not permanently applied to the data, which means you are free to make transformations without worry.When you import Illustrator files as Smart Objects it’s comparable to linking to a source file. For example, copying and pasting from Illustrator gives you the option to paste as a Smart Object.
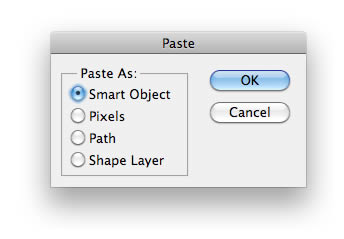 Now if you double click the Smart Object it opens in Illustrator. This vector data is 100% scalable all the time so you can just drop it in there and freely scale and edit as you see fit. Make an edit to your Illustrator file, press Save, and it should update automatically back in your Photoshop file.Even after the advent of Layer Styles, mentioned earlier, we “Photoshoppers” still liked to use various filters to achieve certain looks and effects. The problem here was that filters were also traditionally destructive. Not only was this a permanent edit to the image data but later on in time if you wanted to remember the settings you used to achieve an effect you had no way to recall that information. Unless you were like me and covered your monitor in post-it notes filled with various filter recipes, Oi!Smart Object layers inside of Photoshop, can have filters applied to them. These are called Smart Filters. Now the settings of the filter are embedded in the Smart Object and can be modified later.
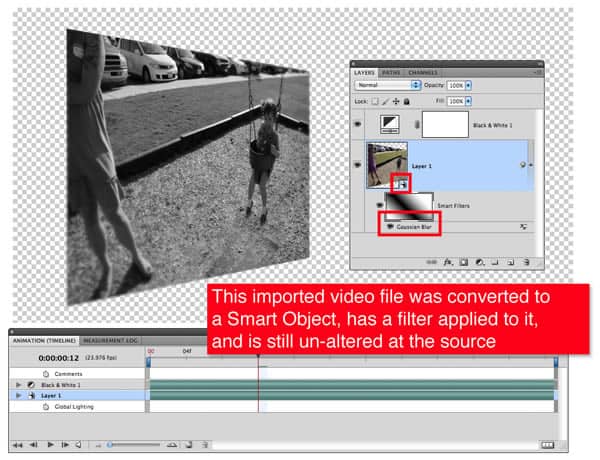
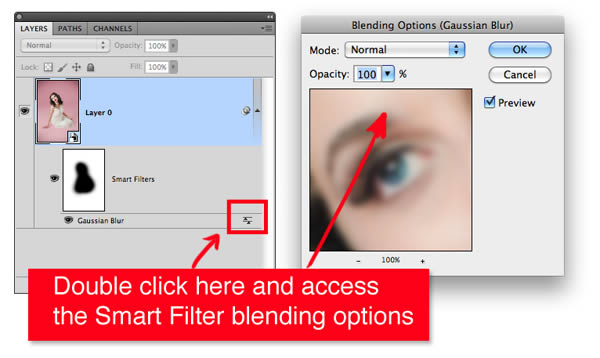 You can also play with this little button on the Smart Filter to adjust the appearance through blend modes and opacity separately from the blend options of the layer itself.You can even convert imported video clips to Smart Objects allowing you to modify the design without damaging the video. They can be resized, skewed, and so much more. This means I can take that quick little snippet of a video that I need to look blurred and add a filter to it. Then, just re-export the video from Photoshop and drop back into my project.

- How editable is this production technique for future revisions, alterations, etc?
- Did this technique make any permanent alterations or do damage to the original image file?
Masks


Image Adjustments
Ok, this could be like opening Pandora’s box so let’s keep it brief and related to NDE. Here are the Image Adjustment options found in the Layers Palette.


Layer Styles


Smart Objects
Raster: Smart objects are one of the greatest additions to Photoshop in my opinion, especially for what it means to the NDE workflow. In a nutshell, you can convert a file/layer into a Smart Object basically protecting it from harm by permanent edits.


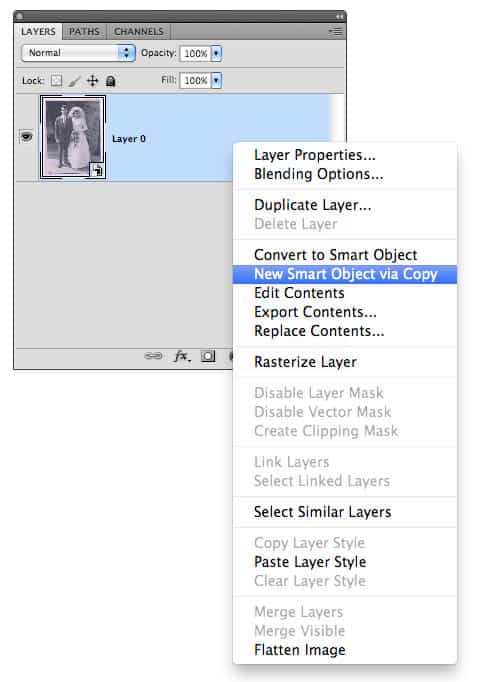
Tip: If you want to have duplicates of the Smart Object layer you must decide how future edits might happen to that Smart Object. So if you duplicate that layer multiple times the traditional way (drag to new layer icon, or Cmd/Ctrl + J), then when you double click to edit one of the Smart Objects, you’re in essence editing ALL the Smart Objects that were duplicated from that source. To get around this, make sure you go to the menu item under Layers > Smart Objects > New Smart Object Via Copy and then it’ll be seen as a different source for the duplicated layer.
Both have their advantages but at least once a month someone asks me about this so I thought it was worth pointing out.
History Snapshot
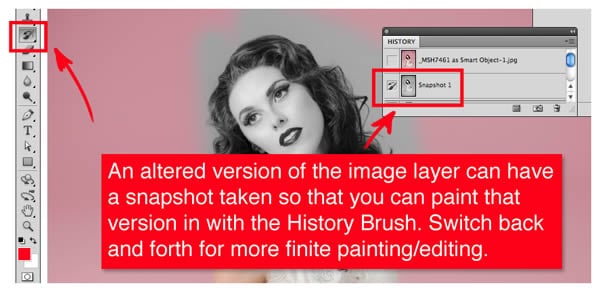
Now this is debatable as an NDE technique, so I’ll leave your personal decision up to you. But, I’ve used it many times and found it really helpful for workflow. Basically you can be working on a layer and at various points in your process take a history snapshot. Because Photoshop has a limited number of undos you can use this technique to rollback to a certain point in your editing.I especially like to use this when I’m trying different filters or painting techniques and then I can paint back in a portion of the look using the History brush.There are lots of other techniques that could just be considered best practices when producing a file that may be utilized again later or shared with another designer. So even though these aren’t NDE, they are well worth learning when you get a chance.
Alpha Channels
These saved selections add very little file-size to a document but are invaluable when you want to recall various types of selections you used while editing.
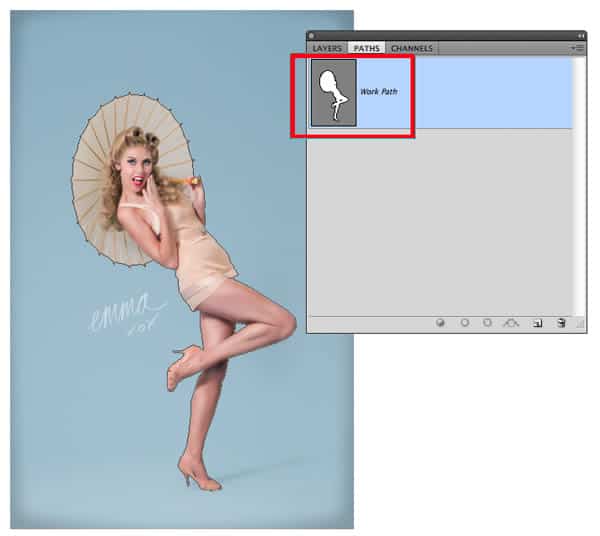
Work Paths
The vector-version of Alpha Channels. But what I like to use them for is to save paths of areas I’ve painted with custom brushes. Because you can stroke a work path with a brush you can consistently use the same path to paint the same coordinates using different scale brushes. It’s great for making these paintbrush tracks.
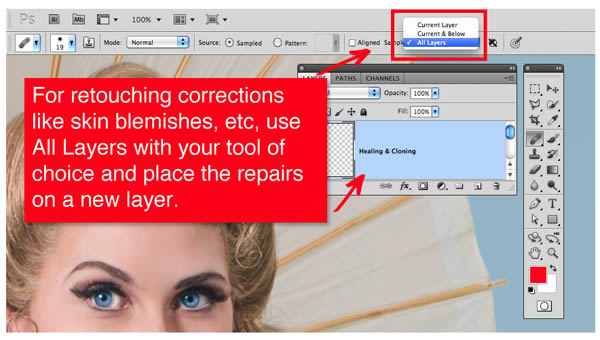
Repairs To A New Layer
Cloning, Healing, Stamping, Patching, are great tools to use for repairing or altering images. But usually we do it directly on the picture. Instead, create a new layer and in the options bar choose “Use All Layers” this way you’re making your repairs to a blank new layer rather than the image layer itself. Nothing destroyed!
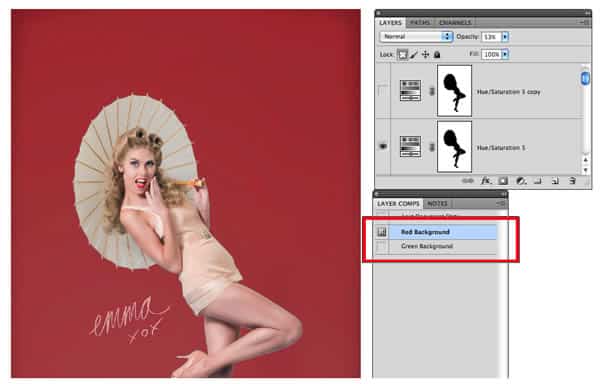
Layer Comps
Not completely NDE but a really great way to rollback between various layouts and looks in your file. So if you want to record an idea you had that might be relevant later, just pull up your layer comp. This is also a great technique when you need to batch save out multiple versions of a design concept. Try using File > Scripts > Layer Comps to Files.